Horse Whip aids are one of the most misunderstood elements of horse riding. When used well, they create quiet, precise communication that supports your leg and seat. When used poorly, they cause tension, confusion or overreaction. This guide explains whip aids clearly so they make sense to both rider and horse, with a focus on timing, clarity and welfare.
The way an aid is delivered can also depend on the type of whip being used. Understanding the main types of horse whips available helps explain why certain aids suit riding whips and crops, while others are more appropriate for schooling or groundwork whips.
Understanding how whip aids work will help you ride more effectively, avoid common mistakes and build a calmer, more responsive partnership.
A whip aid is a secondary cue that reinforces or clarifies the primary leg aid. It should never replace the leg or be used as the first signal. Instead, it backs up the leg when the horse does not react promptly, or when a clearer message is needed for balance, straightness or engagement.
In simple terms: leg first, whip second, reward instantly.
Horse Whip aids can be used:
Correct timing is what makes a whip aid effective and fair. Horses learn through pressure and release, meaning they associate the aid with the moment it occurs. If the whip aid comes too early or too late, the message becomes unclear and the horse may become tense or confused.
Good timing means:
This sequence keeps the horse calm and prevents reliance on the whip.
Whip aids fall into a few main categories depending on the goal of the exercise.
A light tap behind the rider’s leg reminds the horse to move forward promptly. This is the most common whip aid and should be used sparingly.
Used during leg-yield, shoulder-in or similar work. The whip reinforces sideways movement by lightly touching the hindquarter. Timing is crucial—apply during the moment the inside hind leg should step under.
Used for improving activity behind. A soft flick behind the rider’s inside leg can activate the hindquarters and help with transitions or collected work.
Occasionally used on the shoulder to guide the horse away from falling in or out. This must be light and used only when necessary.
A calm, single tap used as a reminder after repeated ignored leg aids. It should be decisive but not aggressive.
Clear whip aids only work when they are applied with correct technique. Even subtle differences in timing can change how an aid is received, which is explored in more detail in how to use a horse whip correctly.
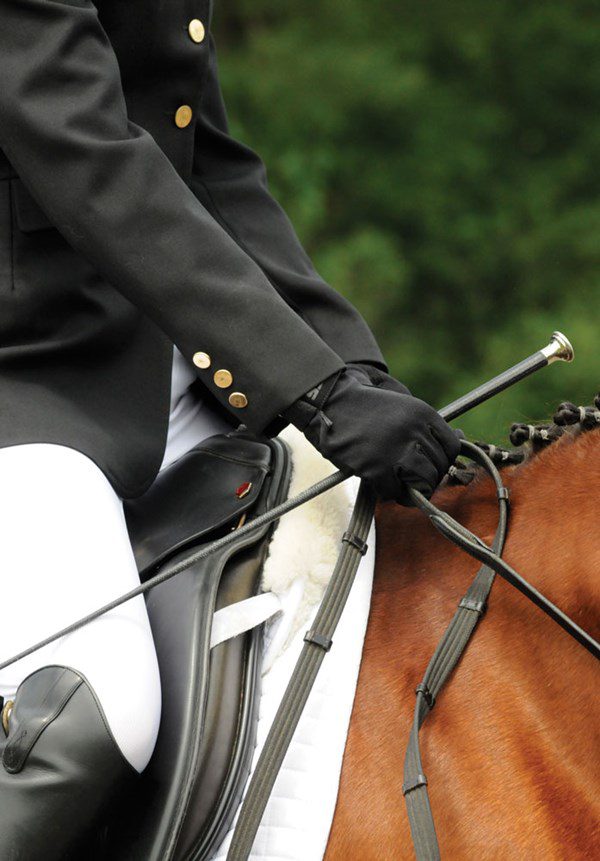
The location of the whip aid directly affects the message the horse receives.
Incorrect placement is a common cause of anxiety or resistance.
A whip aid should be clear but minimal. Horses learn from clarity, not strength.
Follow this order:
Using too much force, tapping repeatedly, or letting frustration creep in will quickly upset the horse and damage trust.
Whip aids should never be a substitute for correct training or confidence building. In some situations, stepping back from the whip altogether can be beneficial. This approach is discussed in how to build horse confidence without a whip, which focuses on progressive, rider-led training methods.
The whip should enhance your aids, not overwhelm them.
When these aids work together, the whip becomes a quiet, subtle tool, not a constant crutch.
Correct responses include:
Incorrect or stressed responses may include:
If tension appears, review your timing and pressure before repeating the aid.
Grip and hand position directly affect the clarity of any whip aid. If a whip is held awkwardly or too tensely, signals can become inconsistent. Our step-by-step guide on how to hold a horse whip explains how correct grip supports better communication.
Repeated or poorly timed aids can lead to dullness or resistance over time. This is often described as a horse becoming “whip-sour”, and understanding the causes is key to preventing it. Our article on why horses become whip-sour explores this in more detail, alongside practical prevention strategies.
Dressage: Whip aids help with engagement, straightness and transitions. Precision and timing are crucial.
Showjumping: Tap behind the leg for forwardness, but avoid overuse. Only soft keepers are competition-legal.
Eventing: Whip aids must follow strict BE and FEI rules, especially in warm-up and jumping phases.
In-hand showing: Whip replaces the leg to guide energy and straightness, used lightly.
Lunging: The whip acts as an extension of the arm to direct tempo, not as a chasing tool.
Whip aids work best when they are timely, calm and consistent. Used correctly, the whip becomes a precise communication tool that reinforces your leg and seat while keeping the horse relaxed and confident. With clear technique and good feel, you can use whip aids to support training rather than disrupt it, building trust and understanding with every ride.
If you’re applying these principles with your own equipment, browsing our selection of horse whips can help you compare styles and lengths that support clear, consistent aids.
Effective whip aids rely on understanding not just timing and feel, but also the wider context of equipment choice, discipline rules, and correct application. If you’d like a broader overview that brings all of this together, the complete horse riding whip guide covers whip types, correct use, sizing, and competition rules in one place.
